In developing major projects in 3ds Max is a large number of objects in the scene nevyhnete.Často you may find that the editor will lose their property and you will need to look at what you lose time and may reduce the effectiveness of your work. One of the best prevention was the scene is well organized and mostly pomenuvávať objects in your scene. 3ds max offers us several tools for overview of what is in our scene and we think of them.

first assistant is the largest such instrument appointing the Scene Explorer, which located in the upper tab tools (Open Container Explorer). In this tool, we have our overview of the whole scene. It contains a list of objects in a scene which are displayed in tabbed information for a given object instance. light intensity, whether the object is hidden (hidden) or we print the number of polygons of the object. The advantage is that the scene explorer editovatetlné parameters we can change directly in the editor by clicking on the displayed value. These bookmarks with information about the values \u200b\u200bwe can configure an instrument from the menu collums Costumize / configure collums added by dragging from the list to the table scene Explorer. Our object in the scene we have the ability to search using the search box or we can find the menu icons Display / Object types to choose what we want objects in scene explorer view.

next most useful tool is Light Lister coming to the Tools menu. Showing us see the list of all the light we have in the scene and we can configure the settings in one place.

To manage our selecting groups of objects used tool named selection set located in the edit tab. Keep us select a set of objects. So if you eg create a scene in five boxes, we classify them together and then press the button Create new set so we automatically create a selection from the list consisting of these magnets. For later re-load selection is used in the Select object set.

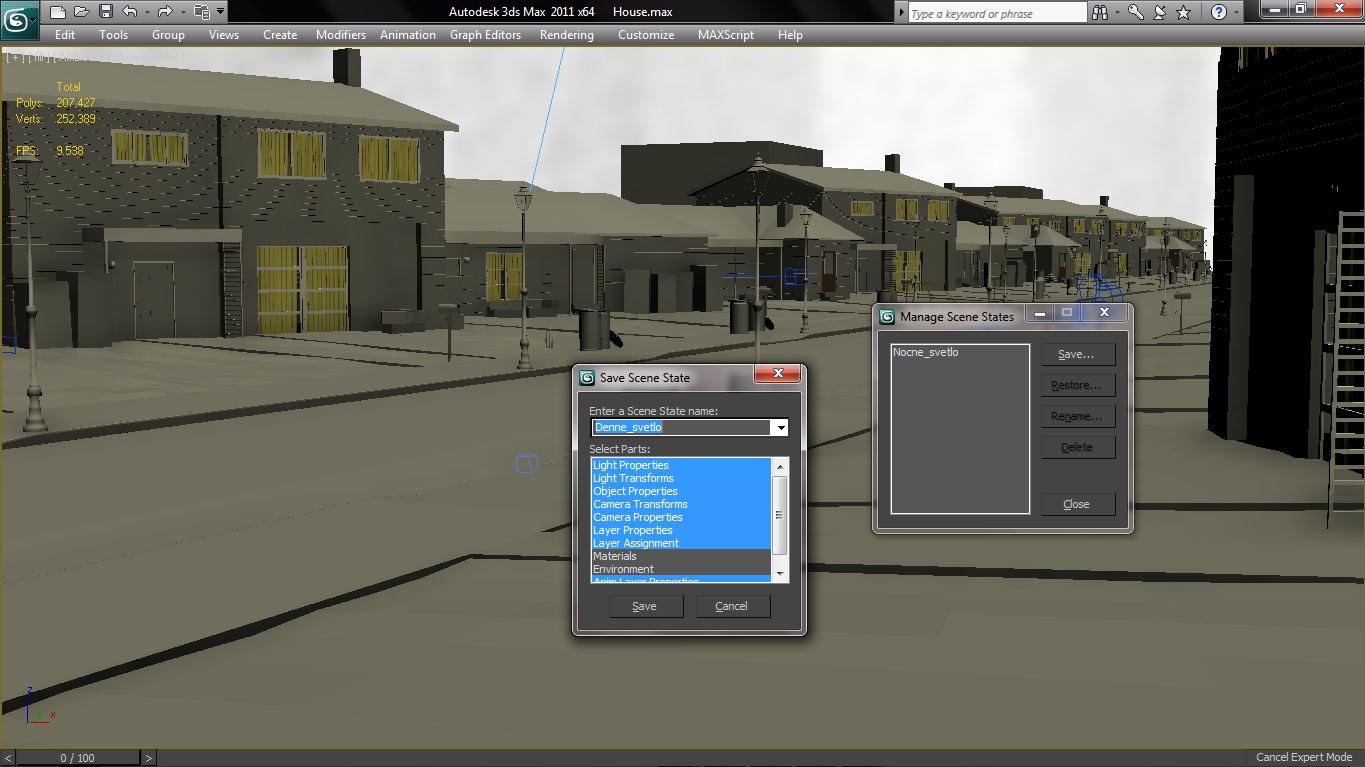
Imagine that you have created a scene in town and want to have quick access to night daytime running lights illuminate when you have defined the advance. Use the Manage Scene States tab in tools you need to copy the source files from 3ds Max, but only if you save the scene setting and then you can click through for example. already mentioned between day and night lighting. Save button to save the current settings for the scene (you can indicate exactly what you want to save and what not) and the Restore button to load the setup into the scene.
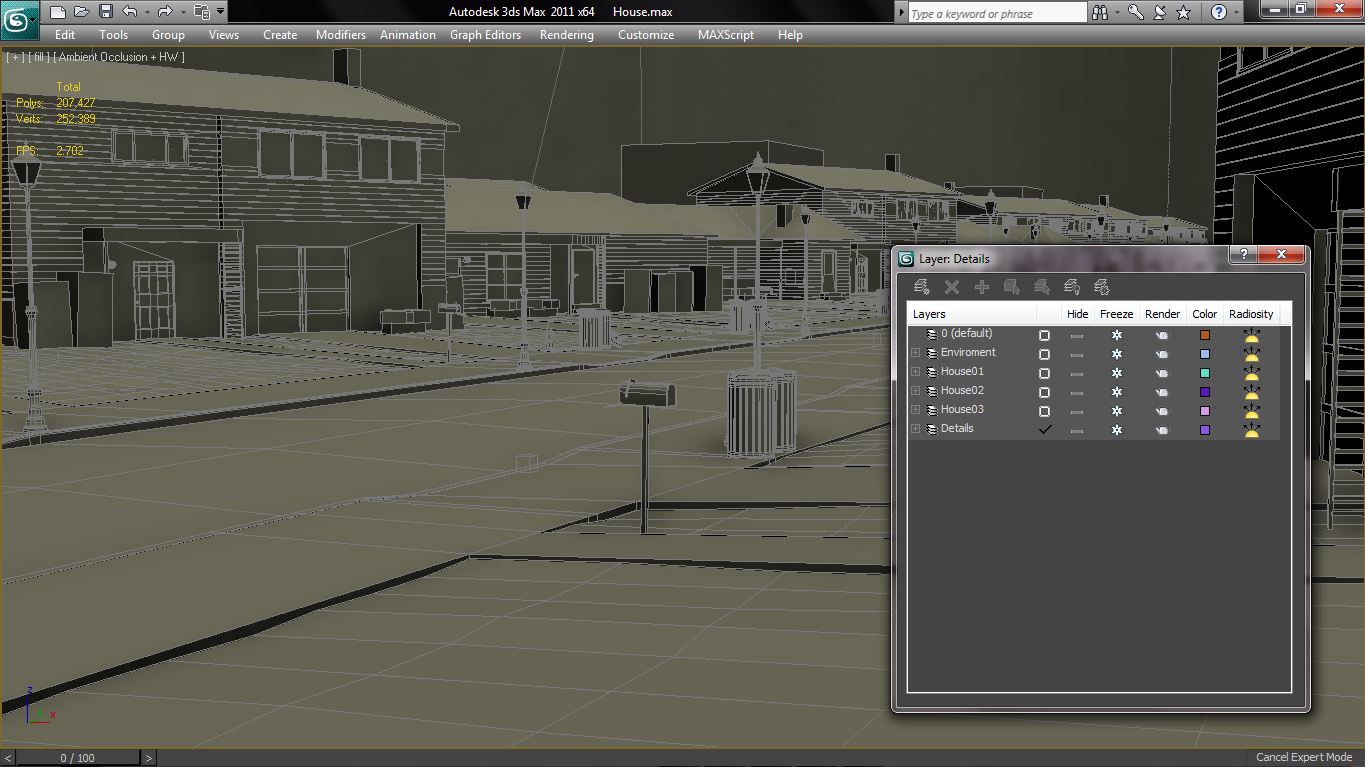
3ds max We also offers distribution of objects into layers. Imagine that you have a house. In one layer may be facade, in the second layer can be further window and turn all the doors. If you share the following objects in the scene using layers Manage (tools tab), you can easily hide unwanted objects to the viewport - hide, frozen surface - freeze, the visibility of objects to render, color or layer visibility for radiosity. Click the box will change to a pipe which indicates that it is the active layer and new objects will be created in it. Button Create new Layer create a new vstvu for objects if you have previously selected objects, so max will ask if you want to insert into novovytvárajúcej layer.
If you press the keyboard "H" so you get a window Select from scene from where you can choose the objects in the scene through the list. If you hold CTRL as you add items individually if you hold shift and allow you to choose several items under them or over them.

Last tool for today that you mention is Material Explorer located in the section rendering. It serves us for a complete overview of materials in the scene. Shows us what we have materials, which are embedded bitmaps into which channels and which material is assigned to an object.

We'll show you one more command which is used for so-called clustering of objects into one group.
first Create your 2 boxes and then labeling them.
second We will move to group bookmarks and click Group. Invite us to enter the name of our new group of objects. after entering the name we can see that objects are grouped together, and we move along with them. Other orders as open to serve the opening group for editing objects, close - closed group for re-completion of specific groupings of objects, Ungroup to remove groups of objects, or attach a new object for connection to the group.
last tool for this tutorial will be a tool for automatic renaming of multiple objects.
Calling rename object and located in the Tools tab.
from the menu you can choose objects which are to be renamed, either selected - Selected or pick - which denote objects. Base choice to write the name as object name to be called. Saobjaví before Prefix Value Base Suffix name and value appears at the end of the Base Name. Numbered box allows the numbering of buildings.

In this tutorial on the organization of the scene would be everything and I hope that in your projects will bring order to help you streamline your work.
0 comments:
Post a Comment